Sunday, July 26, 2009
pasta with goodness
i feel like it's been forever since i've posted a tasty, quick dinner recipe. really, i feel like july has not left me feeling motivated to post. sure, i've been making things...but in the summer i like salads, kabobs and chicken on the grill, and easy foods that take little thought to prepare. so july has been sparse, i'm sorry.
i don't write this blog to show you that i make stuff everyday...i write it hoping that some of the things i make might be worth making to someone else. i also try not to post a picture of something just to include a photo...if the dish doesn't look appetizing, that's all you see. it doesn't matter how good it actually tasted. i hold these standards to other blogs i read and while i'm not a perfect photographer or fantastic in the kitchen or craft room, i want what i post to be "worth" it when i look back.
anyway, just pointing out that i'm not going for quantity, here. i had a moment last week were i felt bad for not posting...but this whole endeavor was for me in the first place and i realized feeling guilty was ridiculous. honestly, i doubt my mom, father-in-law, or thomas cares (and that's whose reading this anyway). ;)
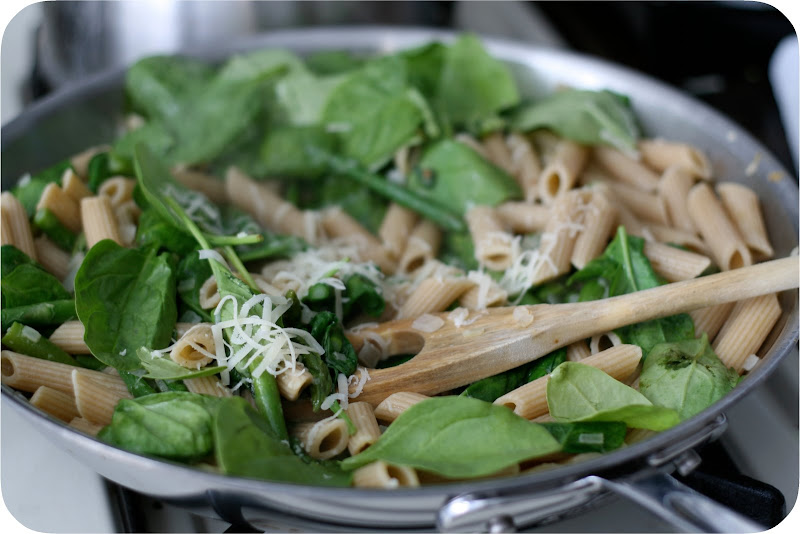
cooking up
this recipe is from cooking light magazine, the june 2007 issue. i keep old magazines because i don't tear out recipes when i make them. i like to go back and preruse old but almost new again material, like this.
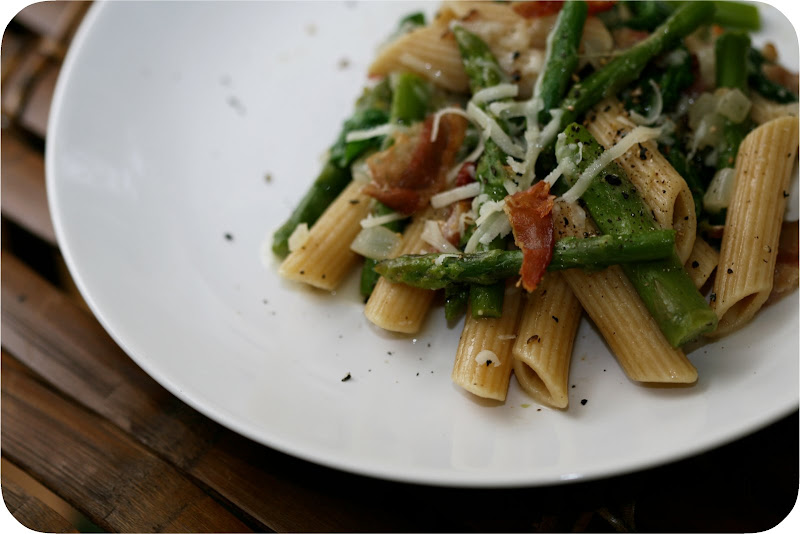
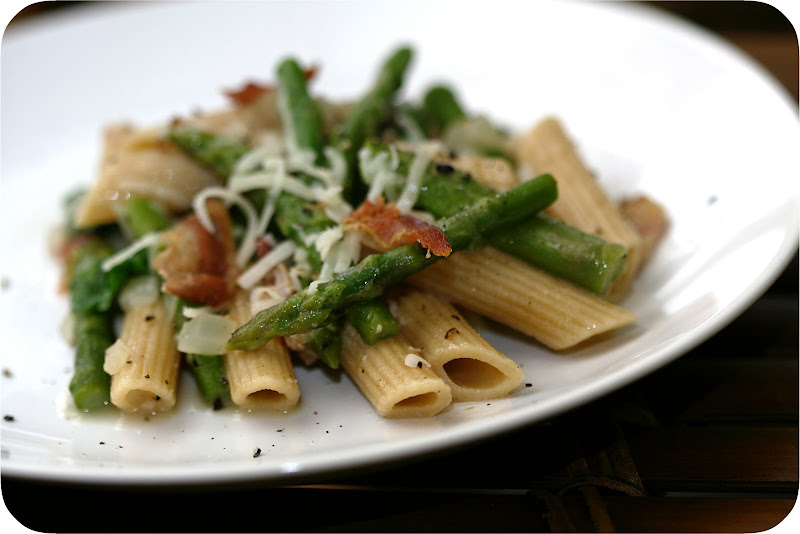
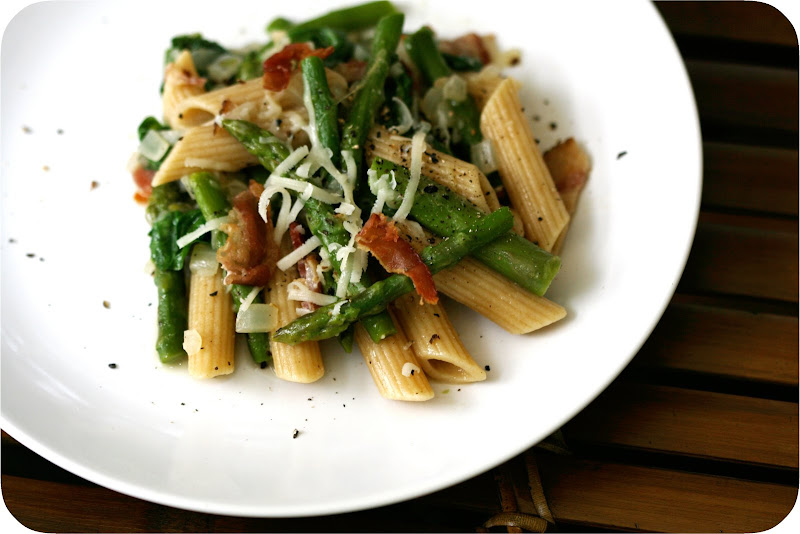
penne with asparagus, spinach and bacon (cooking light)
8 oz wheat penne pasta, cooked al dente
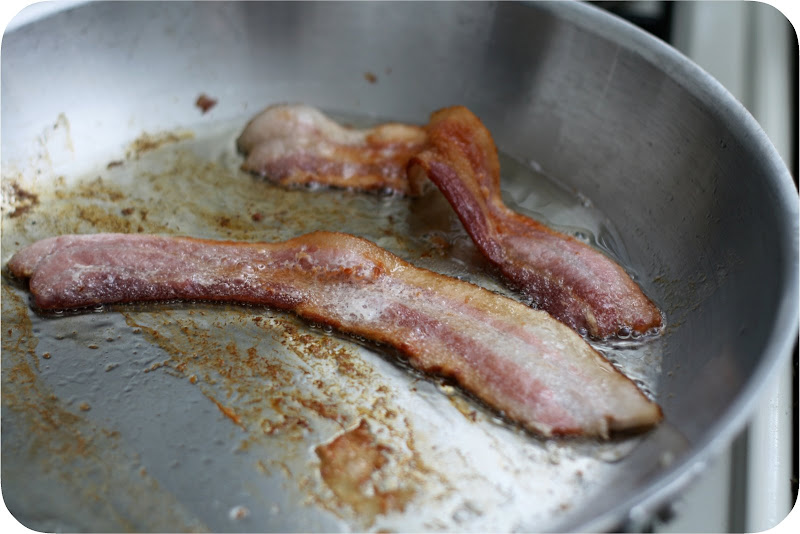
2 slices bacon
1/2 c chopped sweet onion
2 cloves garlic, minced (i added this to the recipe)
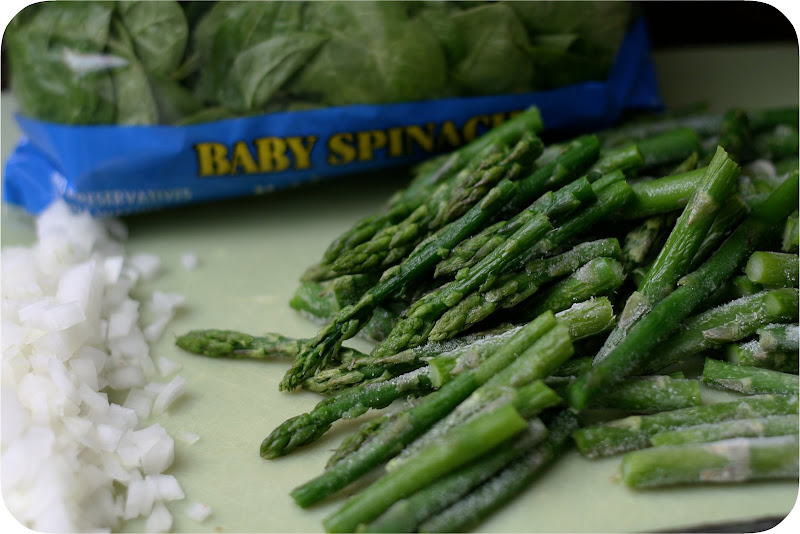
2 1/2 c asparagus, sliced
1 1/2 c chicken broth (fat free, less sodium)
4 c baby spinach leaves
1/2 c parmesan cheese, divided
back pepper
penne with asparagus, spinach and bacon (cooking light)
8 oz wheat penne pasta, cooked al dente
2 slices bacon
1/2 c chopped sweet onion
2 cloves garlic, minced (i added this to the recipe)
2 1/2 c asparagus, sliced
1 1/2 c chicken broth (fat free, less sodium)
4 c baby spinach leaves
1/2 c parmesan cheese, divided
back pepper
1. cook bacon in large skillet until crisp
2. remove bacon and crumble
3. add onion and garlic to bacon drippings, saute for one minute
4. add asparagus and broth to pan, bring to a boil
5. reduce heat and simmer until asparagus is crip-tender
6. add pasta, spinach, 1/4 c cheese, and pepper to taste, stir to combine
7. top withbacon and remaining cheese
as noted, i added garlic because i can't imagine a hot pasta dish without it (honestly, i don't really make anything without garlic). i also used frozen asparagus because that's what was in the house.
Saturday, July 25, 2009
husband made
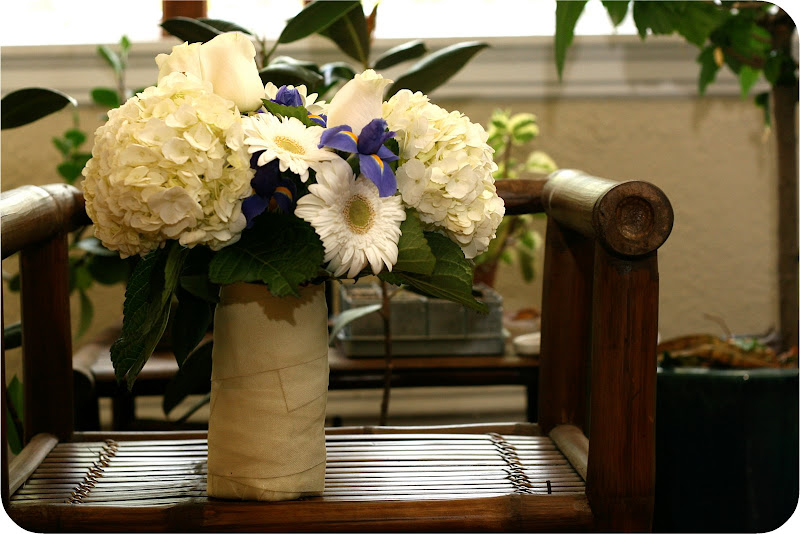
this july marks the second year of my marriage to husband. while i'm a few days late in the post (it was july 21), i wanted to show you his craft work again this year.
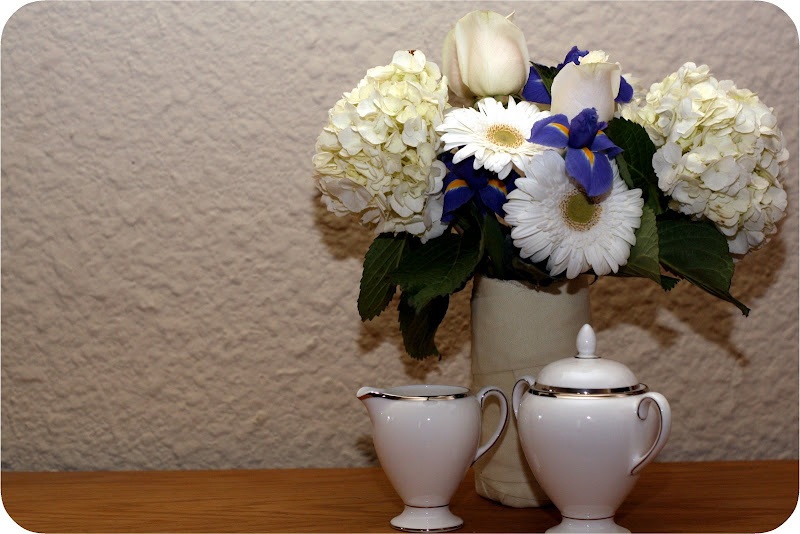
if you remember, last year he made me a vase from paper - the traditional 1st anniversary gift. he decided to continue the tradition an carefully wrapped cotton fabric to create this year's functional work of art. of course he filled it with some flowers that were in my wedding bouquet because that who he is...he doesn't forget dates or important things.
if you remember, last year he made me a vase from paper - the traditional 1st anniversary gift. he decided to continue the tradition an carefully wrapped cotton fabric to create this year's functional work of art. of course he filled it with some flowers that were in my wedding bouquet because that who he is...he doesn't forget dates or important things.
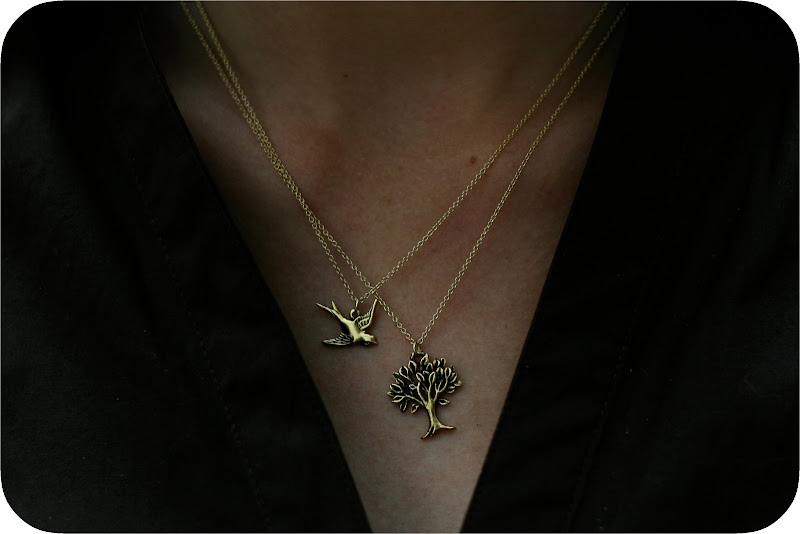
he also got me these necklaces i've been lusting after. they are "swallowed" and "tree of life" from charmed and dangerous. i know there were some shipping issues due to google check-out and the company, but i'd still recommend them (i would give a glorious review had they ponied up to fix the mistake) because the jewelry is cute and reasonably priced.
traditional and modern
he completed the gift trifecta with the sugar and creamer set to our china, the modern gift for a second anniversary. i love them and can't wait for future tea parties.
i'm not mentioning what i got him because it's so not worthy of a place in this post of wonderful. regardless, happy anniversary husband! we made it two years :)
i'm not mentioning what i got him because it's so not worthy of a place in this post of wonderful. regardless, happy anniversary husband! we made it two years :)
Sunday, July 19, 2009
fabric!
i've mentioned here that i have a degree in clothing design. so, yes, i know how to sew, i can make my own clothes (i don't), i have experience with textiles of all sorts. i spent a good amount of my time in college and prior just thinking about fabric, clothes, and making stuff. but one thing i've never done? quilt. so i decided that i'd make one this summer.
i love lofty, worn-in, light-weight quilts. i love to cuddle up in them or lay them out at the park; it's a basic comfort that everyone should have...but i don't have any right now. my only remedy to this was to figure out how to put one together and then wash it 10 times to wear it in. i'll write a few posts so you can follow along and see how it goes...
i love lofty, worn-in, light-weight quilts. i love to cuddle up in them or lay them out at the park; it's a basic comfort that everyone should have...but i don't have any right now. my only remedy to this was to figure out how to put one together and then wash it 10 times to wear it in. i'll write a few posts so you can follow along and see how it goes...
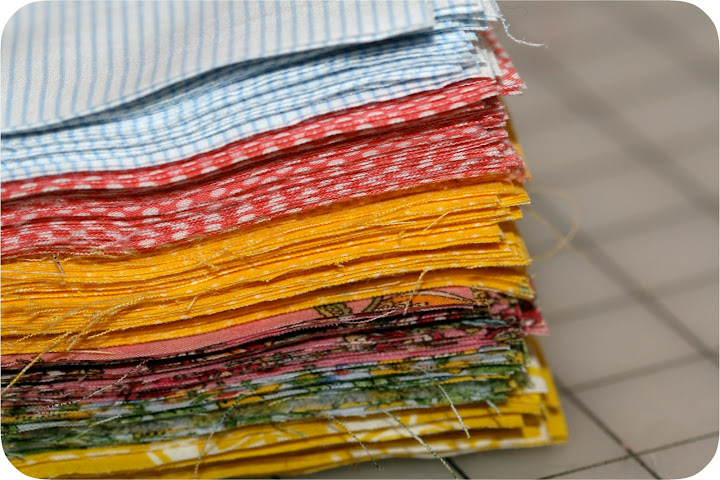
250+ squares cut
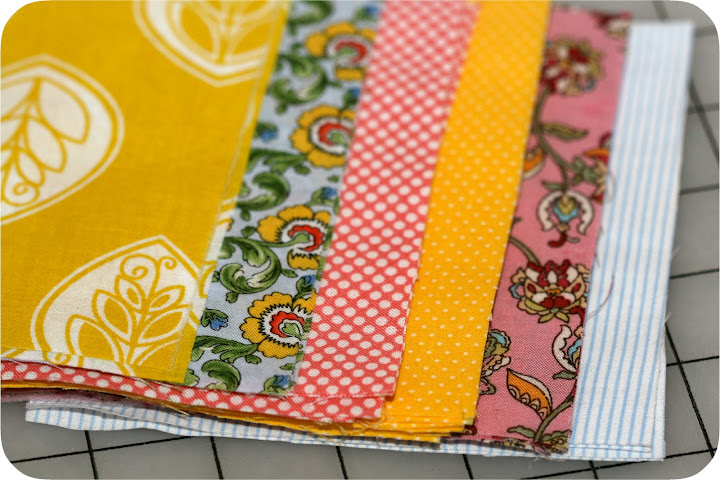
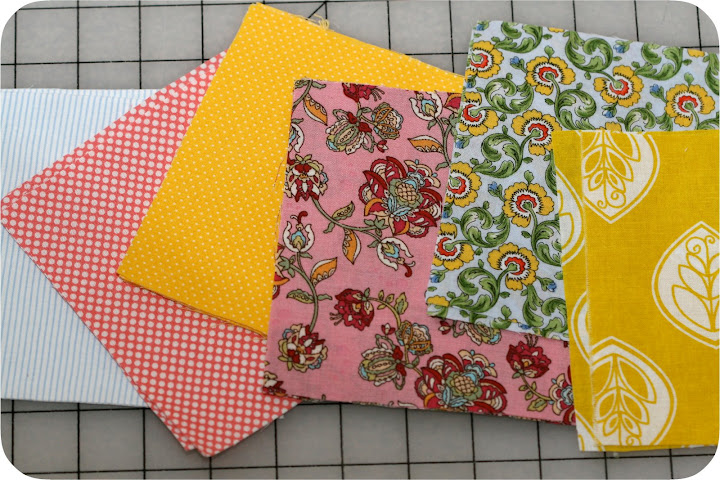
when i saw that joann's was having a quarter sale, it was the only push i needed to go pick out some simple fabrics and the rest of the quilting supplies i'd need. they don't have a great selection if you aren't into neon fabrics, so i picked as best i could and ended up with a pink floral, pink polka dots, blue floral, blue stripe, yellow floral, and yellow dots. because it's my very first quilt, i didn't feel like paying the big money for designer fabrics, but if this one tuns out...i'm in trouble.i'm not following a pattern, a book, or any instructions. i'm making it up as i go based on what i know about sewing and what i've briefly skimmed about quilting.
basic first steps:
1. wash all fabric to shrink and hopefully bleed out
2. iron, iron, and iron (it's a lot of ironing)
3. trim quarters to get straight egdes
4. measure blocks and use a rotary blade to cut uniform squares
5. arrange squares randomly to create rows until desired size
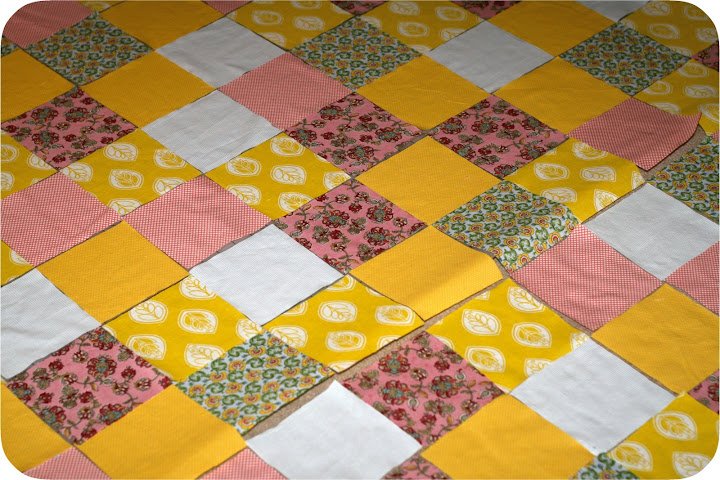
laid out across my floor
this is how far i am. ive got the prep and plans done - the quilt is arranged and i just need to get to sewing. my squares are 5.25 x 5.25" and i think i've got 11 across by 14 down, so it will be about 55 x 70" finished. just seeing it laid out got me excited. i can't wait to drag it outside on the lawn or wrap up on the couch with a good book.
stay tuned for part 2 when i start to sew square after square to complete to quilt top.
stay tuned for part 2 when i start to sew square after square to complete to quilt top.
Tuesday, July 14, 2009
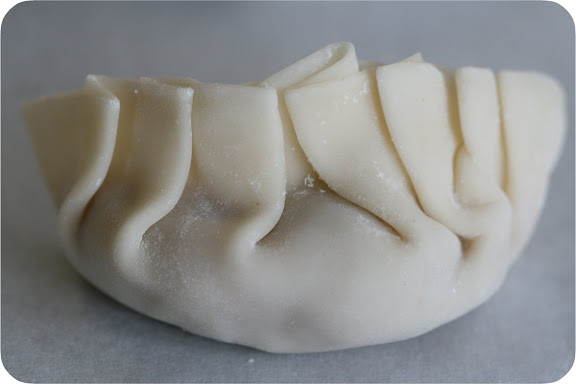
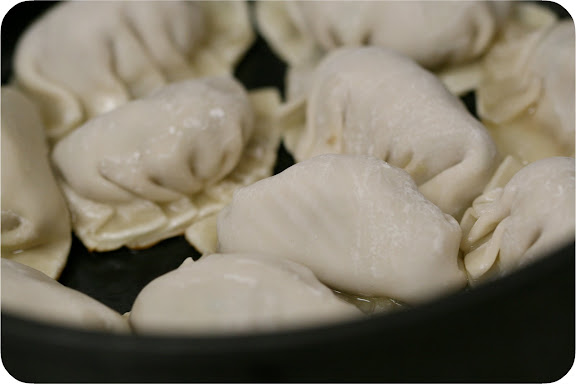
uncooked pork dumplings
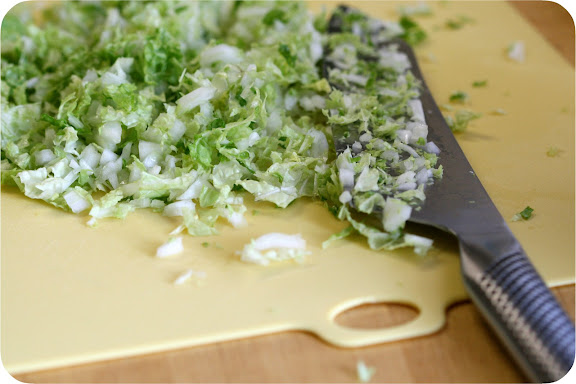
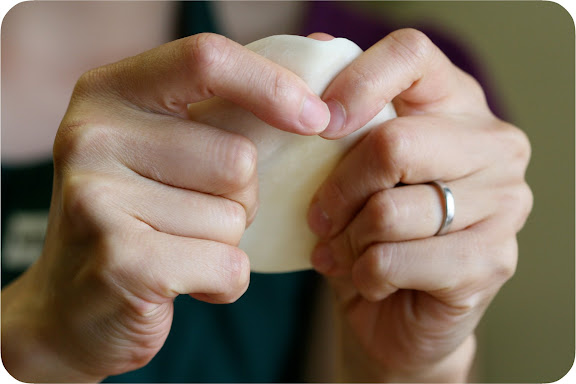
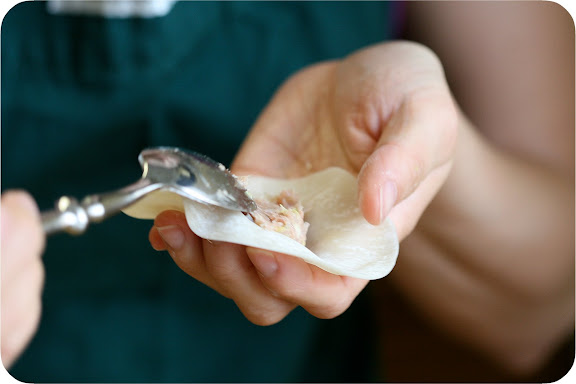
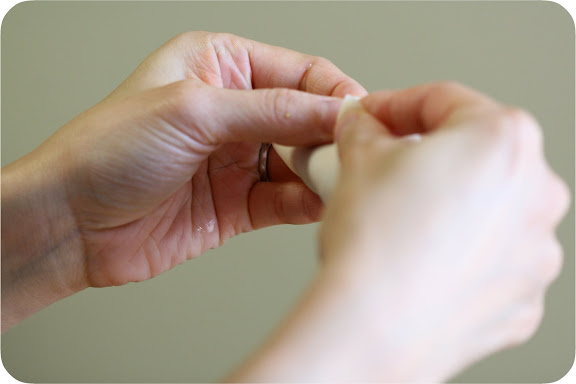
helen's hands demonstrating the process
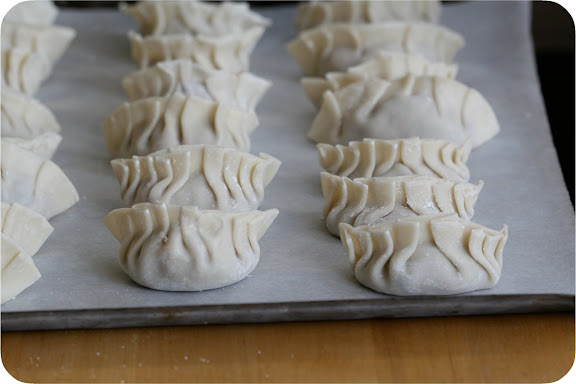
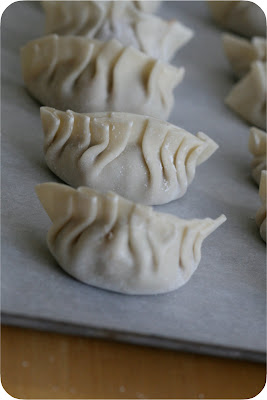
assembled. note husband's, 4 back in the right row ;)

boiled, top left. all others fried.
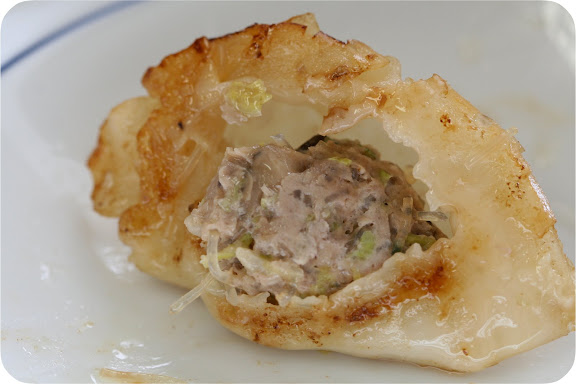
it's good to make just one at first and toss it in to boil. since you can't sample the raw meat to adjust for taste, try a bite cooked and make sure you've got enough soy sauce in the mixture before you go making 100. you'll have dipping sauce, sure, but it's good to have the filling full of flavor. helen mentioned her mom also adds a cracked egg to the meat mixture. we didn't, but you certainly could.
yum. dinner for days.
my friend helen makes amazing food. she bakes like nobody's business (like, every night...or mornings before she gets into work) and the lady can cook-lah. she's introduced me, in one way or another, to so many foods, some of which i will never eat again (i'm talking about you, salty sour plum candy of death), some that i will never try (fish eyes come to mind), and some that she is currently teaching me how to make because i liked them so much.
her pork dumplings are one of those things. she's always claimed they are easy and she's even taught mini courses to her residents - asian wrap parties! so we made a play date, husband and me, to go to her house and learn the art of dumpling wrapping.
for those in the blogosphere, we happened to do this on the same weekend that the "daring cooks" brought dumplings to the table...but these do not follow that recipe and i had no idea it was taking place...i was actually a little bummed to see them all over the next day. i've waited for weeks to post, hoping people might actually want to see dumplings again.
helen's hands demonstrating the process
pork dumplings (courtesy of my chicken sister* helen)
2 packages dumpling wrappers (ours came 50 to a pack)
1 lb ground pork ( or a little more)
1 whole head nappa cabbage, finely chopped/water squeezed
1 bunch scallions, finely chopped
5-6 reconstituted shitake mushrooms, finely chopped
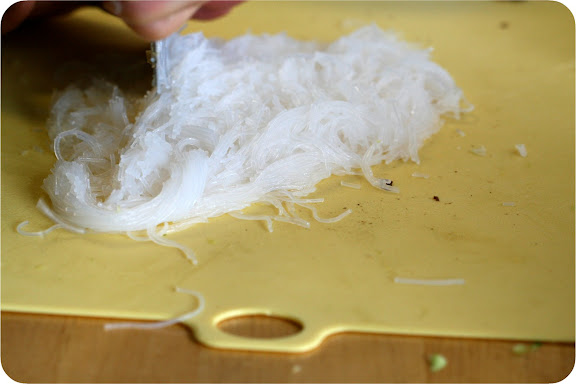
1 pack glass noodles, softened in hot water/cut
2 inches ginger, grated
4 cloves garlic, minced
6 tbsp sesame oil (about)
1/4 c soy sauce (more, to taste)
1-2 tbsp hot chili paste
1 lb ground pork ( or a little more)
1 whole head nappa cabbage, finely chopped/water squeezed
1 bunch scallions, finely chopped
5-6 reconstituted shitake mushrooms, finely chopped
1 pack glass noodles, softened in hot water/cut
2 inches ginger, grated
4 cloves garlic, minced
6 tbsp sesame oil (about)
1/4 c soy sauce (more, to taste)
1-2 tbsp hot chili paste
salt and pepper to taste
combine all ingredients except wrappers and mix fully (by hand works best - meat should be slighted colored by soy sauce)
assembling dumplings:
assembling dumplings:
1. take one dumpling wrapper and slightly stretch it
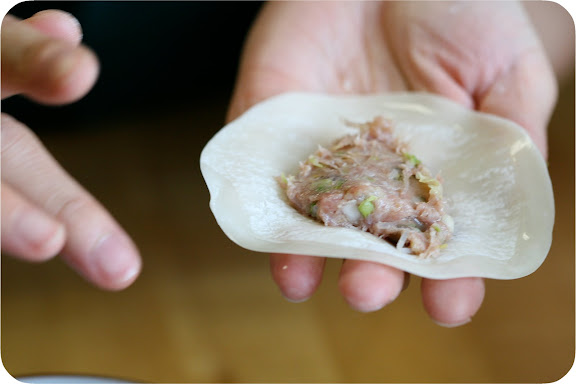
2. lay it flat in your palm and using your other hand, drop 1-2 tbsp pork mixture into the center
3. dip your free index finger into a bowl of water and wet the entire edge of the wrapper
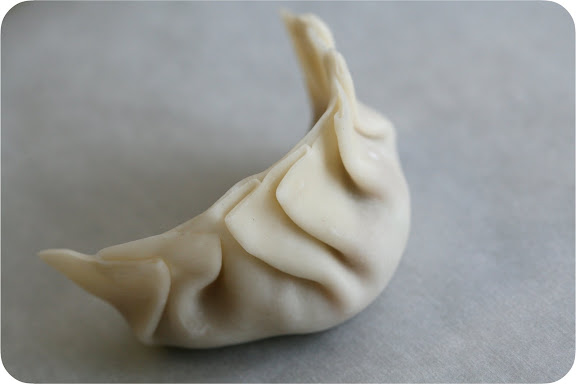
4. gently fold the dumpling in half without pressing the seam
5. pinch the center front and fold it down, pressing to close the sides together at the center edge
6. pinch another fold just right of the middle, again pressing to the other side to seal
7. continue pinching, folding and pressing to complete the right side
8. repeat the process, folding in toward the middle, on the left side
9. firmly seal the outside corners and slightly curve the dumpling into a crescent
2. lay it flat in your palm and using your other hand, drop 1-2 tbsp pork mixture into the center
3. dip your free index finger into a bowl of water and wet the entire edge of the wrapper
4. gently fold the dumpling in half without pressing the seam
5. pinch the center front and fold it down, pressing to close the sides together at the center edge
6. pinch another fold just right of the middle, again pressing to the other side to seal
7. continue pinching, folding and pressing to complete the right side
8. repeat the process, folding in toward the middle, on the left side
9. firmly seal the outside corners and slightly curve the dumpling into a crescent
assembled. note husband's, 4 back in the right row ;)
to boil:
1. drop dumplings into boiling water
2. allow to cook until translucent and floating
3. drain and serve
to fry (pot stickers, literally):
1. heat oil over medium flame in a large saute pan
2. carefully line the pan with dumplings, do not overlap
3. cook until crisp but not burned
4. pour in 1/4- 1/2 c water (this results in lots of spitting and steam, careful!) and cover
5. allow to steam thoroughly, then remove from pan
to freeze:
1. line a baking sheet with parchment
2. place dumplings onto sheet, seperated so they are not touching
3. flash freeze for about 30 minutes, then drop into freezer bags for storage
4. to eat, boil or pan fry from frozen state
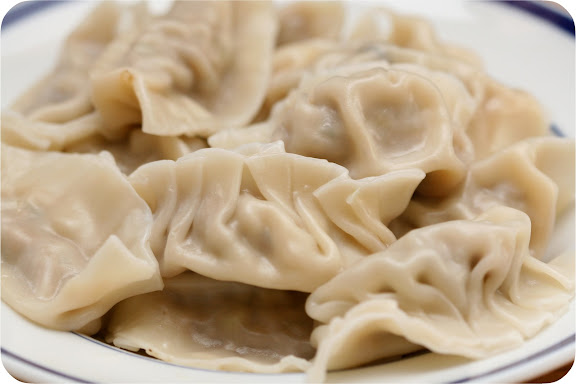
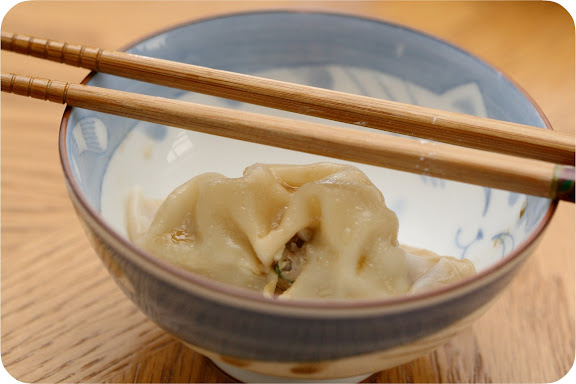
boiled, top left. all others fried.
it's good to make just one at first and toss it in to boil. since you can't sample the raw meat to adjust for taste, try a bite cooked and make sure you've got enough soy sauce in the mixture before you go making 100. you'll have dipping sauce, sure, but it's good to have the filling full of flavor. helen mentioned her mom also adds a cracked egg to the meat mixture. we didn't, but you certainly could.
yum. dinner for days.
we actually made double this recipe, so 200. enough for us to eat dinner while we continued to wrap, plus 2 one-gallon bags of frozen dumplings, 1 for both helen's house and mine. we dipped them into bowls of soy sauce and sesame oil. for a spicy version, we had a bowl with chili paste added, as well.
fried are better (of course!), but boiled are excellent too. husband and i have had multiple quick meal nights of asian cucumber salad and dumplings both ways and we have since plowed through our bag of frozen dumplings. they.are.good. it's worth it to make them at home, going the quick route with the pre-made dough, but spending time wrapping and chatting. it's also so inexpensive. it probably costs $10 for 100 dumplings...something a restaurant just cannot offer.
i can't wait until next time...korean sushi is at the top of my list. i eat that stuff roll after roll and helen's is the best!
*helen is my chicken sister because we competed with husband and my boss in a chicken wing eating contest. it was hilarious and horrible and disgusting. i love wings, but not when i'm racing to down dry, cold ones at fast as possible. we did not win...
Monday, July 6, 2009


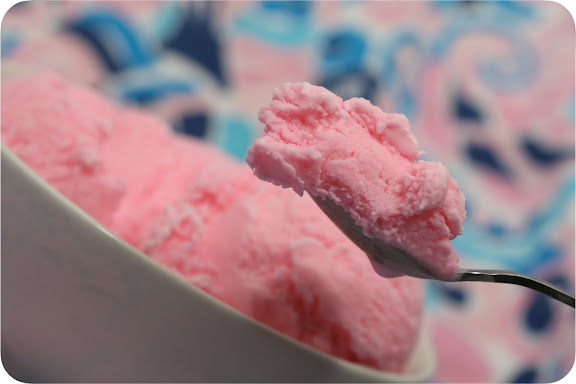
it's pink!
if there's one thing i've always loved, it's wintergreen. i grew up chewing those leaves from the wild and if i'm picking minty gum or lifesavers, it's wintergreen flavor above all others. it's no surprise to me, then, that i love teaberry ice cream as much as i do. unfortunately, i've never had it from the store and never been able to find a retailer or ice cream shop outside of PA that carries it. truth be told, i've had it only a dozen or so times on childhood drives to my mom's hometown. but it's a lasting flavor and the memory of it keeps me searching the internet for a local source.
i'm not kidding. i've asked my grocers for a special shipment of the hershey's variety - i swear i'd buy it all if they couldn't sell it to others. if you've never had it, i promise you're missing out. it's a magical pink, with wintergreen flavor, cold and weird and slightly like those pink lozenges (you know, they're 2 for $1, cello bag with a red crinkly label...powdery and chalky and so wintergreeny). so imagine my surprise when, in searching for cotton candy and bubblegum ice cream flavorings (these you just can't whip up with regular ingredients), i came across this teaberry candy oil. you better believe i ponied up the cash for shipping (which is more than the oil itself) and placed an order seconds after finding it.
i'm not kidding. i've asked my grocers for a special shipment of the hershey's variety - i swear i'd buy it all if they couldn't sell it to others. if you've never had it, i promise you're missing out. it's a magical pink, with wintergreen flavor, cold and weird and slightly like those pink lozenges (you know, they're 2 for $1, cello bag with a red crinkly label...powdery and chalky and so wintergreeny). so imagine my surprise when, in searching for cotton candy and bubblegum ice cream flavorings (these you just can't whip up with regular ingredients), i came across this teaberry candy oil. you better believe i ponied up the cash for shipping (which is more than the oil itself) and placed an order seconds after finding it.

it's teaberry!
i wanted to make the most basic ice cream base to add in the flavoring and after searching, i came up with a very small batch recipe for testing purposes.
teaberry ice cream
teaberry ice cream
3/4 c whole milk
1/2 c sugar
1/2 c heavy cream
2-3 drops teaberry candy oil (this is potent!)
2-3 drops pink gel color
1. stir sugar into milk until dissolved
2. add in heavy cream and whip slightly
3. add flavor and color, stir to combine
4. pour into ice cream maker and freeze according to manufacturer instructions
2-3 drops pink gel color
1. stir sugar into milk until dissolved
2. add in heavy cream and whip slightly
3. add flavor and color, stir to combine
4. pour into ice cream maker and freeze according to manufacturer instructions

the dream that you wish will come true...
and there it was. in my house! my very own homemade teaberry ice cream. i had high, high hopes. full disclosure: i was slightly disappointed. this is not the hershey's teaberry from the roadside shoppe. it's very wintergreeny and possibly a little oily/soapy. maybe i put in too much? it wasn't as though my tongue or throat was on fire that way other strong oils/alcohols tend to cause and i can't imagine that using less would make much of a difference. it wasn't bad and i ate the whole batch, but it was missing something. something that makes it more candy like.
i'm not giving up (i can't, i have an entire bottle to use up) and will continue to adapt this recipe. if only hershey's would release their secret! hershey's...you reading this? there is demand! please supply!
Thursday, July 2, 2009
quick and easy
we don't have a garden this year and the very worst part about that is not having an unlimited supply of basil and tiny tomatoes (lord knows we didn't get a decent beefsteak out of that garden). turns out, it is much cheaper to use basil at your leisure when you grow it yourself (i, of course, knew this...but maybe someone doesn't?). this is important because it directly relates to me having to purchase baby tomatoes and basil this summer and for this recipe specifically. i don't have a choice, so i do it...but i had to pout just a bit.
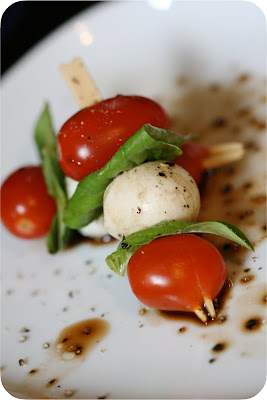
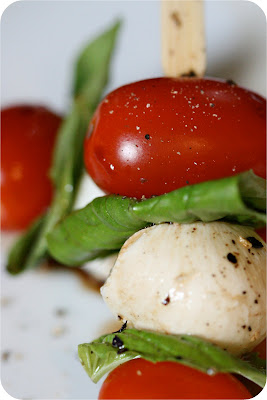
for these simple skewers, you're going to need access to (via garden, farmers market, or the grocery store) some basil and tomatoes, plus tiny mozzarella cheese balls called bocconcini and just a bit of balsamic vinegar. you can make them on toothpicks, party picks, bamboo skewers or whatever floats your caprese boat.
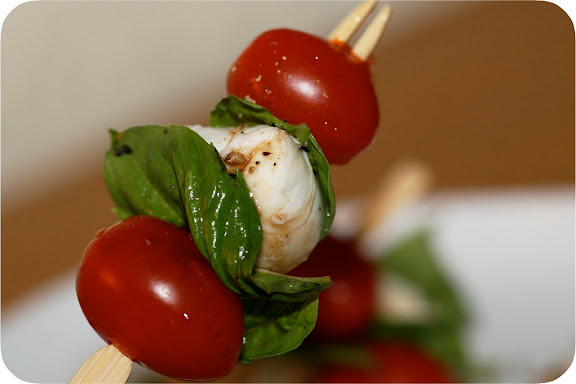
to assemble, thread on at least one grape/cherry tomato, one mozz ball, and one basil leaf - you can do patterns or get fancy if you'd like. to finish, drizzle them with balsamic vinegar and a good shake each of salt and pepper.
for these simple skewers, you're going to need access to (via garden, farmers market, or the grocery store) some basil and tomatoes, plus tiny mozzarella cheese balls called bocconcini and just a bit of balsamic vinegar. you can make them on toothpicks, party picks, bamboo skewers or whatever floats your caprese boat.
to assemble, thread on at least one grape/cherry tomato, one mozz ball, and one basil leaf - you can do patterns or get fancy if you'd like. to finish, drizzle them with balsamic vinegar and a good shake each of salt and pepper.
perfect for a bbq or gathering for the 4th!
Subscribe to:
Posts (Atom)
