Thursday, December 24, 2009

one project of recent was my holiday cards, which i've been making for a few years now. this year i wanted to gocco again and while i was interested in a multi-color, possible multi-screen design...i decided against it because i like simple and i don't want to waste precious, limited supplies.


outside and inside (sorry for the shallow depth of field)
i created this tree and hanging ornaments design in illustrator using basic shapes and some intricate snowflake cutouts (from my favorite snowflake website, make-a-flake). i flashed the front screen and made a separate inside greeting screen (i made the most of this screen by flashing a few additional design, soon to come). i printed with white ink on moss folded A6 cards and sent them in glass luxe envelopes.

raised print
the color is off in the above photo, but i just had to show off the embossing i did on a few of them. i learned this quick trick from my friend kim: dust super fine, clear embossing powder to the wet gocco ink, tap it off, and heat using an embossing gun. the design will emboss, slightly raised and shiny, and looks so adorable.
unfortunately, these prints were not without some hiccups. for whatever reason, my screen was missing some print areas in the tree and a number of the prints had blank areas. i still got about 50 good prints and was able to send all of my holiday cards to family and friends. i sincerely hope i didn't miss anyone!
happy holidays, season's greetings, merry chirstmas 2009. enjoy this lovely time of year!
Labels: paper/graphic design
Tuesday, December 22, 2009

i was on a photography board and came across a link with a unique way of manipulating bokeh (the blurry, often background, parts of a photo). here is the tutorial.
after seeing the instructions, i decided to whip up a lens hood and see if it would work. i chose a 1 inch gingerbread man hole punch and made a hood out of black construction paper to fit over my 50 mm 1.8 lens. it took me a bit to figure out how to shoot with it on, but i aimed it at my christmas tree and tested the technique. as long as the subject appears blurry in the viewfinder, the bokeh will work. the lights look like little gingerbread men!
i'd show you a picture of my lens hood but it is one shoddy piece of work. instead, check out my sample images and those in the link. i'm sure there a few random uses for something like this. either way, i found it interesting and am still a bit confused as to how it works.
Labels: photography
Sunday, December 20, 2009
i know, i've been away. i just haven't had it in me to blog. i make dinner almost every night, but the idea of blogging, with the pictures and editing and writing...i don't know. maybe a new year's resolution for me will be to find something that works for me and blogging. it might help now that we have somewhere to live in january (not a house, but a condo for a year) and that i can focus on the baby and all of the things that are soon to change my life.
but before all of that, there are basics. like simple, good food. that's what i try to make everyday to balance some of the pregnancy cravings and indulgences. this pork chop and slaw recipe is perfect. i've never liked applesauce on my chops, but this is a nice, fresh variation of apples and pork.
pork chops with honey-mustard sauce and apple slaw (adapted from rachelraymag.com)
1 green apple, sliced into matchsticks
juice of 1/2 lemon
4 c shredded red cabbage
4 scallions, thinly sliced on an angle
4 boneless pork loin chops, pounded 1 inch thick
1 tbsp extra-virgin olive oil
1 c chicken stock
1/4 c whole grain mustard
1/4 c honey
2 tbsp cider vinegar or white wine vinegar
salt and pepper
1. toss the apple with the lemon juice, then add cabbage and scallions
2. in a large nonstick skillet, heat oil over medium-high heat
3. season the pork chops with salt and pepper and add to pan
4. cook, turning once, until browned, about 8 minutes
5. remove from pan and allow to rest
6. add chicken stock, mustard, honey, and vinegar to the skillet and bring to a boil
7. cook until reduced, about 1 minute; season with salt and pepper
8. place a pork chop atop some slaw and pour on sauce
yum! the slaw was tangy and crisp, the pork perfectly cooked, and the sauce sweet and mustard filled. it was a hit with both husband and me and i imagine this would be nice to serve at a throw-together dinner party. it's got great color for a winter meal and was a nice break to all the beef i've been consuming.
Labels: real food
Tuesday, December 8, 2009

these are just digital files, obviously, but i recently had a number of thank you cards to send out. being that we have a baby on the way and we moved, our generous and thoughtful friends deserved a little note in the mail for the nice things they did along the way.
i made two designs, one for baby gifts (the above is in our baby colors of grey, aqua, and yellow) printed on white cover stock, and one for general thanks in a fall theme, printed on ivory cover stock. very simple, but worth the effort of about 30 hand made cards to show our appreciation. i imagine we'll be sending out cards like these (with new designs!) for months to come.
i made two designs, one for baby gifts (the above is in our baby colors of grey, aqua, and yellow) printed on white cover stock, and one for general thanks in a fall theme, printed on ivory cover stock. very simple, but worth the effort of about 30 hand made cards to show our appreciation. i imagine we'll be sending out cards like these (with new designs!) for months to come.
Labels: paper/graphic design
Friday, December 4, 2009
now don't go scrunching your nose and saying you don't like turnips. i didn't like them either. growing up my dad was fond of root vegetables and my mom, sister and i were not. what a battle! since my dad did much of the cooking, those root veggies showed up a time or two, much to the dismay of the females of the house (i.e. everyone else). but we were weird, because as a child i remember liking liver and onions, brussel sprouts, and lots of other foods many kids and adults alike do not prefer. and just like my taste for liver has changed (to no, thanks, ugh), so has my taste for root vegetables.
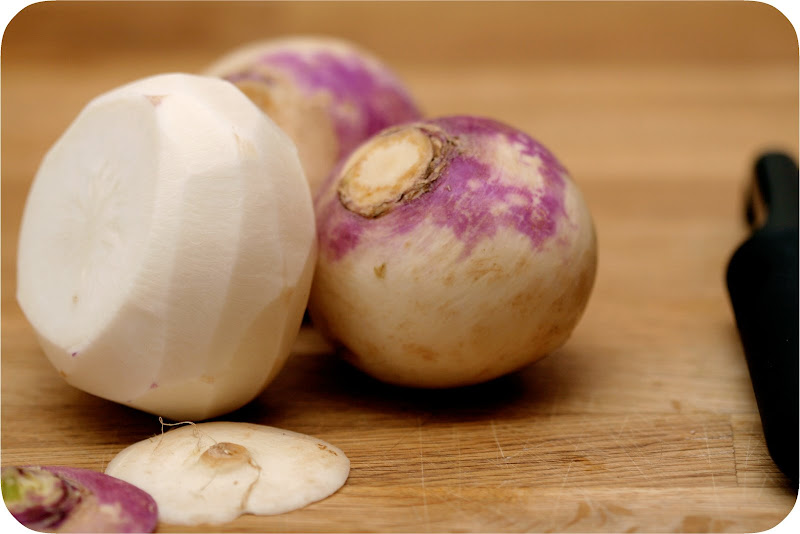
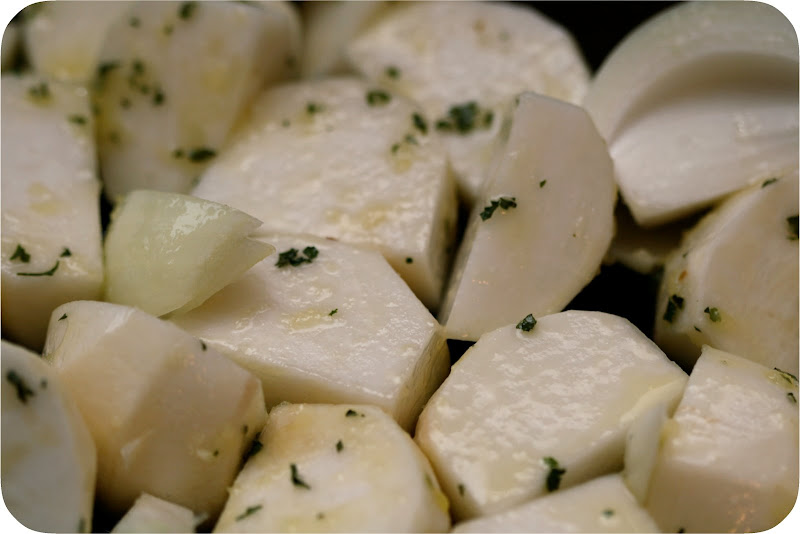
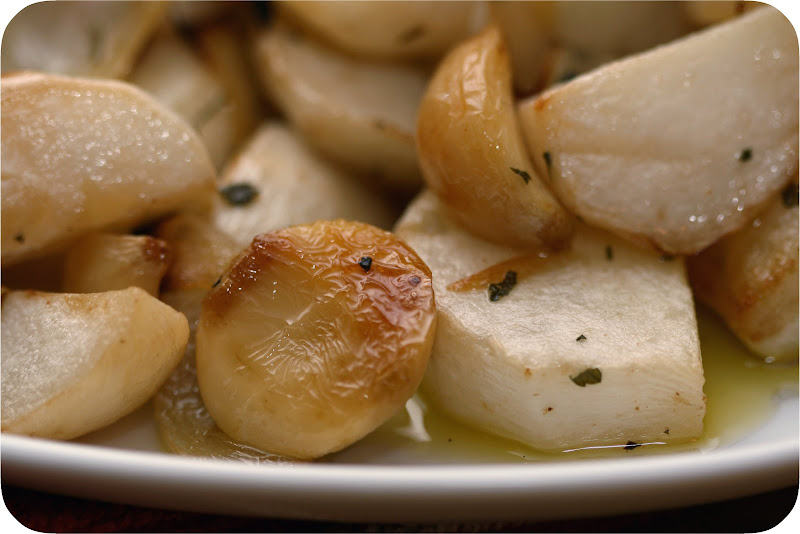
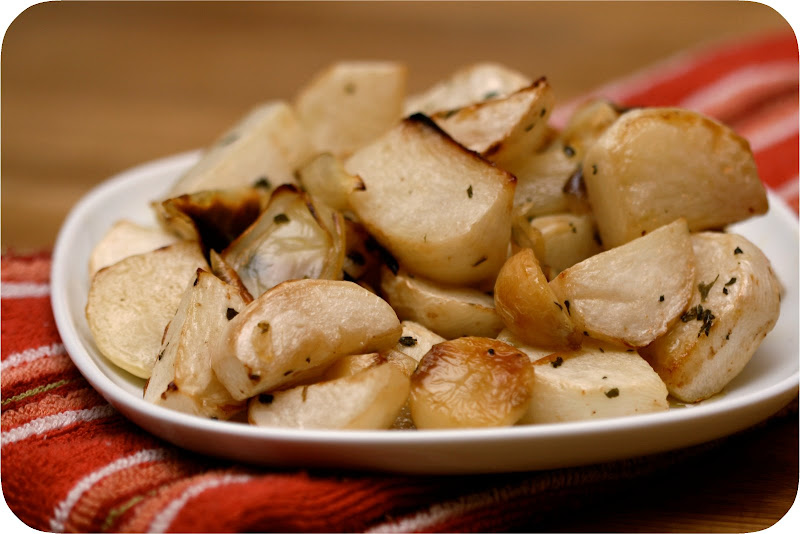
this is simple. it's like roasting anything else, but it turns a vegetable many people don't want into something palatable and, daresay, even tasty.
roasted turnips
3-4 medium turnips
1 small sweet onion, cut into chunks (or some shallots, peeled and whole)
5-7 cloves garlic, peeled
2-3 tbsp olive oil
1 tsp dried parsley (you could do fresh, too)
salt and pepper
pinch of sugar
1. trim and peel the turnips
2. cut into wedges and place into baking pan with onion and garlic
3. generously coat with olive oil, parsley, salt and pepper, and a bit of sugar
4. bake at 375F until edges brown and turnips are soft, about 35 minutes
these are not potatoes, no. they cannot replace, but they can stand in a time or two. they are soft on the inside with a crispy outside and they taste not too strong, like a food you'd want to eat. i promise.
Labels: real food
Wednesday, December 2, 2009
ok, after posting my woeful pity party for one, i'm back. i have lots of posts and i'm going to stop complaining now :)
thanksgiving came and went, but not without mountains of food (many of those mountains consumed by 23 weeks pregnant me...). i had a delightful holiday at my sister's apartment (with it's tiny kitchen and easy bake oven), where husband and i spent quality time with my parents and sister. we all brought a few dishes and i was in charge of snacks, cranberry sauce (i made a simple one with orange segments and orange juice), and the dessert.
i don't like pumpkin pie (and neither does my sister), so i tried to come up with a pumpkin alternative. i had made a version of this trifle a few years ago using paula dean's recipe. because we were on location and my cooking space and supplies were limited, i made the gingerbread in advance and decided to stick to basics for the rest.
supplies and half of the layers (photos on location!)
the big change in the recipe came from homemade gingerbread. paula dean's calls for prepackaged, which is totally fine, but i was craving something at least partially from scratch. after searching, i came across this gramercy tavern gingerbread from gourmet, whih i made in a baking dish rather than a bundt pan.i'm not posting any of the recipes, since i've linked above and it's pretty simple. yes, i used cool whip, pumpkin pie filling, and boxed pudding mix...but it doesn't matter because the gingerbread is out of this world good (i mean, it has guinness in it). to trifle it up, layer half of the gingerbread (crumbled) into the bowl, top with half the pumpkin mixture, then top with cool whip. lather, rinse, repeat. or just repeat, and you'll be left with an easy, pretty dessert.
and a tasty one, too. the pumpkin seeps around the gingerbread and the cool whip balances all the fall spices. i would prefer whipped cream, but i can't complain too much. if you don't have anywhere to take a trifle, or are done with pumpkin for the season, please go ahead and make the gingerbread. so worth it.
Labels: dessert
Subscribe to:
Comments (Atom)
