Friday, February 27, 2009
healthy enough for team fit...and good, too!
since i coach college cheerleading, i'm part of the athletic department at the university. i was invited to join the fitness challenge (as part of a department initiative) and am on team fit #1. (yes! we're winning already!) each week we have to commit to 3 20-minute workouts and 2 smart choices. i figure if you aren't already doing that...well...you should be. in addition to the work, we get together each week for a lunch. the members of each team bring in healthy foods (1 team per week) and we all eat together and rationalize that dark chocolate oatmeal raspberry bars are a smart choice...check!


it was a TINY piece of butter...promise
team #1 was up first a few weeks ago and i offered to bring something that included my favorite things: israeli couscous (a new love/obsession of mine), grilled veggies, and cheese. for once, i can claim this recipe as totally mine. and yes, even health food can have butter. it makes a world of difference in flavor and in moderation, is fine!


grilled vegetable and israeli couscous salad
1 1/3 c israeli couscous
1 3/4 c vegetable or chicken broth
1/2 tbsp butter (yes, use butter!)
1/4 c pine nuts
1 tbsp olive oil
vegetables of your choice (zucchini, bell peppers, cremini mushrooms, asparagus all work well)
cherry or grape tomatoes
zest of 1 lemon
iberico cheese, cubed
dressing:
1/4 c balsamic vinegar
1/4 c olive oil
2 tbsp honey
1-2 cloves minced garlic
chopped parsley, basil and rosemary (I used fresh parsley and dried basil/rosemary)
salt and pepper
1. slightly brown the butter in sauce pot and toast pine nuts until golden, remove and reserve on a plate
2. in same pan, add 1 tbsp oil and the couscous, toast until golden (about 5 minutes)
3. add broth to pan, bring to a boil and stir
4. reduce heat, cover and cook until all liquid has been absorbed (10-12 minutes)
*this couscous tends to stick to my pans, so i stir every once in while
5. chop vegetables into medium/bite sized pieces and generously salt and pepper them
6. on a grill pan (or sauté could work), cook until veggies are slighted softened and have grill marks
7. whisk dressing ingredients, adjust for taste
8. in a large bowl, combine grilled veggies with dressing, allow to sit for 20 minutes
9. stir in cooled couscous, pine nuts, tomatoes, lemon zest, and cubed cheese
*if you make this ahead, i would leave out the cheese until right before serving time

small presentation plate for husband
as i expected, i loved this salad. i eat something like this about once a week (usually warm, though). i keep a well stocked pantry of couscous, jars of artichokes and roasted peppers, canned tomatoes, and pine nuts and prepare a one pot dinner when i just can't come up with anything more creative. with the grilled fresh vegetables, cheese, and whole tomatoes, this was a welcome change. you could definitely use a pasta or smaller couscous, but i am partial to the israeli style because it's hearty and fun to eat.
this was also a hit at the athletic lunch. i got lots of questions about it and even shared a little info about my blog. i hope some colleagues stop by for the recipe so they can make this again!
go team #1!!
this was also a hit at the athletic lunch. i got lots of questions about it and even shared a little info about my blog. i hope some colleagues stop by for the recipe so they can make this again!
go team #1!!
Labels: real food
Sunday, February 22, 2009

a bundle of goodness
no valentine's meal is complete without dessert. and dessert is rarely complete without chocolate. but i've made many chocolate treats so when searching through intercourses (if you don't remember, it's an aphrodisiac cookbook), i wanted something more than just "death by chocolate" (more! what more?). when i got to the chapter on figs, it became clear i would use one of the recipes, but they all looked so good...then i came to the chocolate fig bundle page and it practically chose itself.
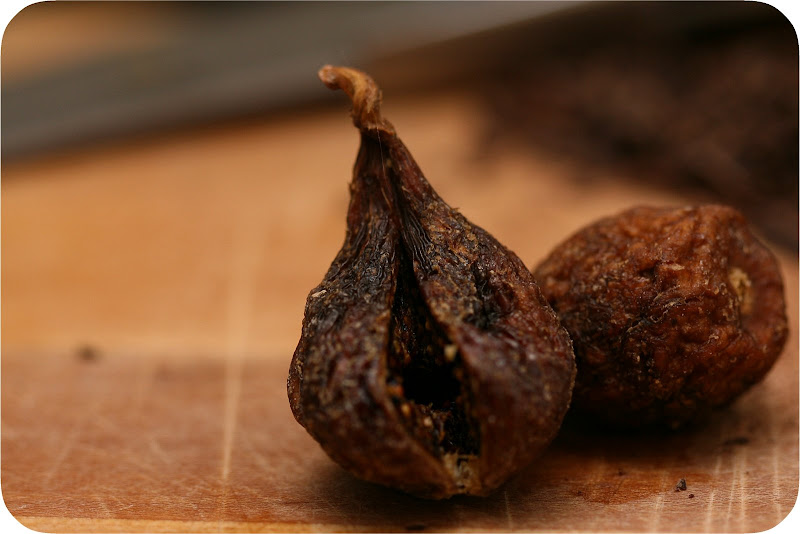

figs, almonds, and chocolate
i didn't have to convince husband - chocolate, figs, brandy, and almonds? plus we had most of the ingredients on hand. figs and brandy on the list, we had no trouble finding these on our shopping trip.

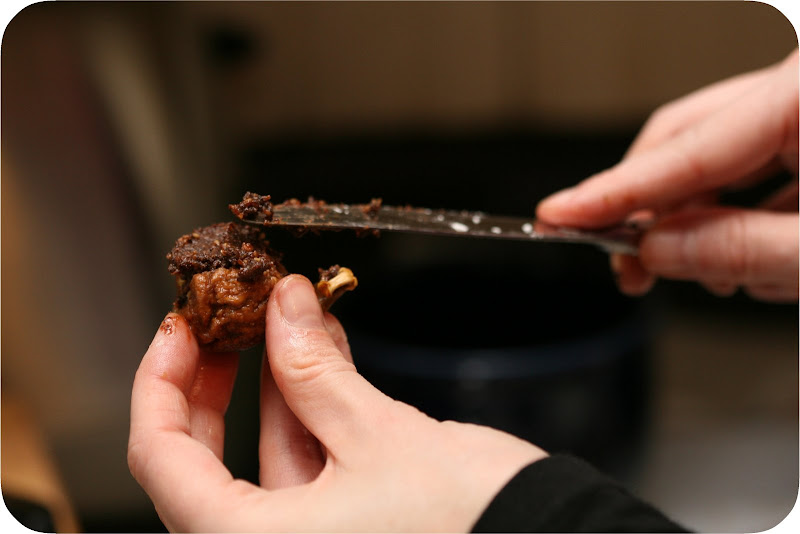


assembling goodness
chocolate fig bundles
6 dried figs
1 1/2 tbsp brandy, divided
16 whole almonds, toasted, divided
1 tbsp sugar
1/2 oz chocolate, finely chopped (recipe calls for semisweet, i used dark)
6 dried figs
1 1/2 tbsp brandy, divided
16 whole almonds, toasted, divided
1 tbsp sugar
1/2 oz chocolate, finely chopped (recipe calls for semisweet, i used dark)
3 sheets phyllo pastry, thawed
2 tbsp unsalted butter, melted
3 tbsp powdered sugar
1. slit figs down the side and place in a bowl with 1 tbsp brandy, allow to sit for 30 minutes
2. in a food processor, grind 10 almonds with granulated sugar
3. combine mixture with 1/2 tbsp brandy and chocolate until it forms a paste
4. stuff 1 tsp of filling mixture into each fig, along with one whole almond
5. set out 1 sheet of phyllo and keep others moist with a damp cloth
6. lightly brush sheet with melted butter and fold the left third to the middle and right third to middle (to form a 3-layer sheet)
7. lightly butter the surface and sprinkle with 2 tsp powdered sugar, then cut in half to form two rectangles
8. place a stuffed fig, slit side up, in the center of the rectangle
9. pinch each corner in half and bring each to center to form a closed pouch
10. repeat for all, then brush pouches with melted butter and place on a baking sheet
11. bake at 375F for 13 minutes, until crisp and golden
12. cool slighty and garnish with powdered sugar
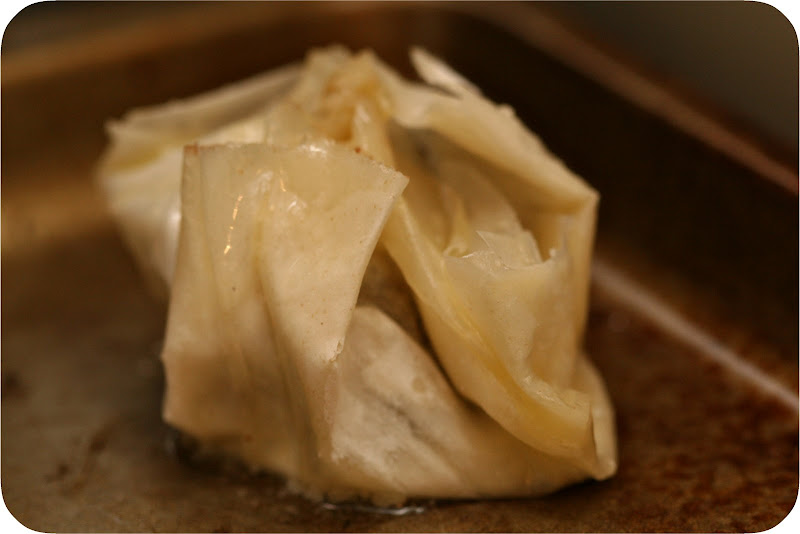

while it might seem like a lot of steps, the recipe is quite easy. if you've never used phyllo, this is a forgiving way to try it out. the bundles don't have to be perfect, they just have to contain the goodness.
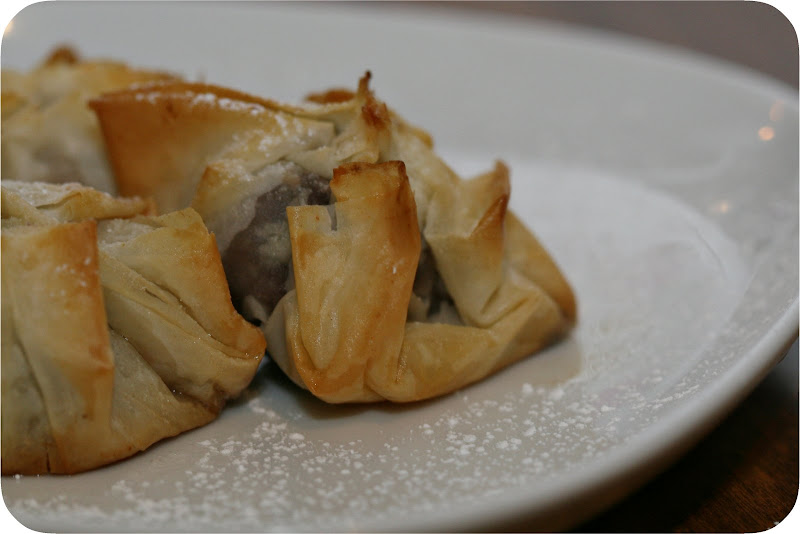
yum! dessert finally
and good these were. it's not every dessert that offers you everything in one bite, plus the surprise whole almond. the figs are so sweet and taste only slightly of warm brandy. i loved every bite. we managed to have one left over (in truth, we made more than 6 because we are gluttons) and it was still good for breakfast the next day.
in all, the valentine's day, meal, and experience was a great one. it was nice to not buy cards, but to instead spend time together and cook with husband. the only thing i regret is not trying recipes from intercourses sooner. we've since had two other meals from the book (i promise i'll share them!) and both were excellent. i don't often use cookbooks now that i spend 70% of my time on the internet, where recipes are free and available to anyone, but if i were to recommend a cookbook, it would be this one. and do try to buy it as a bachelorette gift for someone you know, and ecourage them to try it out sooner rather than later!
Labels: dessert
Friday, February 20, 2009

a delicious, aphrodisiac filled meal
continuing our valentine's day food adventure, husband and i set out to make dinner. even after scarfing down our scallops and asparagus rolls, shopping all morning kept us hungry enough to make more food. when choosing dinner from the intercourses cookbook, we picked a meat, a starch, and a veggie. i grew up in wi...this is what we do.
valentine's dinner 2009:
cornish hens with strawberry-balsamic sauce
chipotle macaroni and cheese
steamed artichokes with green goddess dressing
valentine's dinner 2009:
cornish hens with strawberry-balsamic sauce
chipotle macaroni and cheese
steamed artichokes with green goddess dressing


raw meat + cooking = crispy hens!
first up were the cornish hens. at the strip we found these big guys for $4 each. a bargain, i'd say. this recipe couldn't be easier and little tiny birds are a good way to start roasting if you haven't done it before. plus, these only take about 30 minutes...so you don't have to plan a fancy day of cooking if you don't have the time for that.
cornish hens with strawberry-balsamic sauce
2 cornish game hens
2 tbsp olive oil
salt and pepper to taste
glaze:
1/2 c strawberry jam
1 1/2 tsp balsamic vinegar
1 tbsp white wine
1/8 tsp pepper
salt to taste
1 dried thai chile
1. rinse and dry hens, rub with olive oil and salt & pepper inside and out
2. tie legs together and place breast side up in a roasting pan
3. roast at 425F until thigh temp is 165, about 30 minutes
4. while hens roast, combine jam, vinegar, wine, pepper, and salt over medium heat
5. once jam melts, add chile and let steep for 5 minutes (for added spice, cut chile in half)
6. serve sauce over roasted hens

mac with a kick
then things got a little crazy. when it came time to make the chipotle mac, i didn't measure. i eye balled and didn't taste in between. holy spicy with a side of flames, this macaroni and cheese is not for children. it wasn't for me, either. i would have loved it had the mere smell of it not caused me to tear up. one bite and my lips were puffy (not in an attractive, sultry way, but in a red, swollen, brazilian-plastic-surgery-without-a-license way). husband did like it, and while he admitted it was hot, he managed to eat the entire pan (not in one sitting!) paired with other foods and more cheese. go ahead and give this a try, but add cautiously...maybe taste test along the way...
chipotle mac
8 oz penne pasta
1 tbsp adobo sauce (from a can chipotle peppers in adobo)
1 8oz carton creme fraiche
salt and pepper
1/2 c grated parmesan
1. cook pasta according to directions until al dente
2. stir adobo sauce into creme fraiche
3. drain noodles and add to small casserole dish
4. season with salt and pepper and stir in creme fraiche mixture until evenly coated
5. top with parmesan cheese
6. place under broiler until golden brown, 2-3 minutes

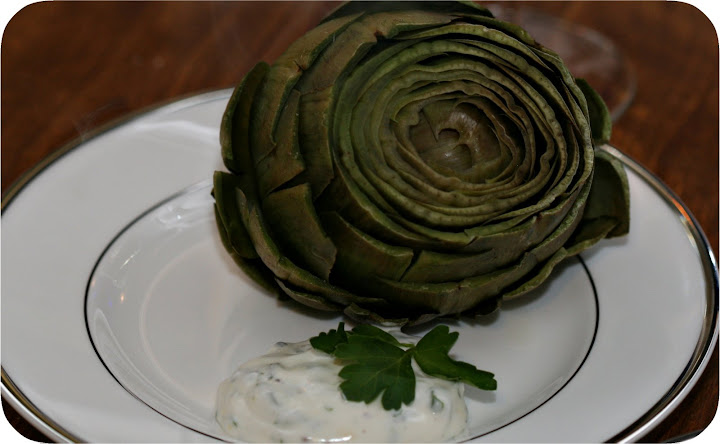
yum! artichokes not canned, not marinated
this was another 'step outside the box' food for me. while i eat artichoke hearts by the costco jar (true), my only experience with whole artichokes was one time in college. also important to note, that's probably the only story i have that includes, yeah i tried that one time in college. unless you count the time i went to an insane riot (much larger and more dangerous than our recent superbowl one, let me assure you) and was shot at with tear gas and rubber bullets. let me be clear, i was not rioting and i do not support riots...but that was a once-in-a-lifetime, college type thing that i couldn't pass up. anyway, back to college artichokes. husband and i boiled them and ate the leaves dipped in melted butter. it was meh, so i hadn't made them again until now.
steamed artichoke leaves with green goddess dressing
2 artichokes
1/2 c sour cream
1/2 tbsp champagne vinegar
1/3 c mayo
3 tbsp buttermilk
zest of half a lemon
1 tbsp chopped tarragon
1/2 tbsp chives
1 tsp minced parsley
salt and pepper to taste
1. trim off the artichoke stems so they sit flat, then snap off the tough outer leaves at the base
2. trim off the top third with a sharp knife (i also trimmed the sharp leaf tips)
3. wash well, spreading leaves, then turn upside down and shake
4. place in a large, microwave-safe bowl over an inch of water
5. microwave, covered for 6-8 minutes then let sit for 10 minutes
6. test a leaf for softness, microwave a few more minutes if it remains tough
7. while artichokes steam, prepare dressing - combine all ingredients and chill
8. to enjoy, pull off leaf by leaf and dip into dressing
this dinner, while partly too hot, was super good. i would do it all again (minus about 3/4 the amount of adobo sauce). plus, this was the very first time ever that husband and i have used our china we got as wedding gifts. not because i don't like it, because i do. i love it so much but i have no serving dishes so i've never used it while dining with friends. i think i'll need to bring it out more often. maybe for tea, too, since the cups and saucers are adorable. but i have no tea pot for it! and since i am crazy, i'lll have to wait until i have the whole set to have parties with my china.
next up...dessert!
Labels: real food
Thursday, February 19, 2009

prosciutto wrapped asparagus
this year husband and i decided to celebrate valentine's day by cooking together. specifically, i suggested we choose recipes from an aphrodisiac cookbook called intercourses (steamy title, i know). i received this book at my bachelorette party from a good friend and i think it's one of the best gifts...but for what ever reason, i haven't made anything from it yet. so we went through the chapters and picked a recipe for most of the foods. we tried to find a few appetizers, a good selection for dinner, and a dessert.
then we made a day of it. in the morning we went down to the "strip", an area filled with specialty food shops and street vendors and one of my favorite things about this city. after breakfast (chocolate covered strawberries, scones, and smoothies) we set out to find all the items on our list. if i hadn't been stuffed full of smoothie (and had it not been 9:30 am) i would have so gotten a gyro from the street vendor...we walked past that guy 4 times and each time i debated getting one because it smelled so good. supplies procured, back home we went, ready for a day of fine cuisine.
then we made a day of it. in the morning we went down to the "strip", an area filled with specialty food shops and street vendors and one of my favorite things about this city. after breakfast (chocolate covered strawberries, scones, and smoothies) we set out to find all the items on our list. if i hadn't been stuffed full of smoothie (and had it not been 9:30 am) i would have so gotten a gyro from the street vendor...we walked past that guy 4 times and each time i debated getting one because it smelled so good. supplies procured, back home we went, ready for a day of fine cuisine.


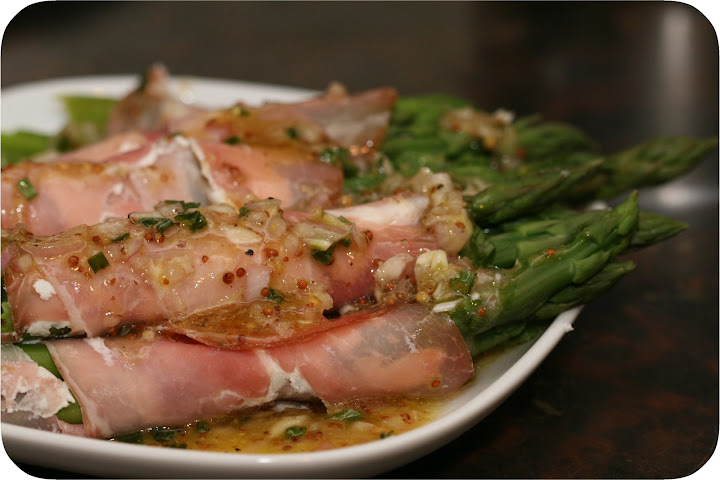
so easy, so so good
first up for the day was appetizers.
asparagus-prosciutto rolls
6 stalks thick asparagus or 12 stalks thin, trimmed
1 tbsp white wine vinegar
1 tbsp dijon mustard
1/2 tsp honey
1 clove of garlic, thinly sliced
1 small shallot, minced
salt and freshly ground black pepper to taste
3 tbsp extra-virgin olive oil
3 thin slices prosciutto, cut in half crosswise (i didn't cut mine)
3 tbsp goat cheese or cream cheese, divided (i used goat)
1 tbsp minced fresh chives for garnish
1. boil a pot of salted water to a boil over high heat & prepare a large bowl of ice water
2. add the asparagus to boiling water and cook for until bright green and just tender 3. remove the cooked spears and dunk in the ice water to stop the cooking; drain and pat dry
4. mix vinegar, mustard, honey, garlic, shallot, salt and pepper; pour in olive oil and whisk until emulsified
5. set a slice of prosciutto on a clean surface and spread on 1/2 tablespoon of goat cheese
6. set 1 thick spear or 2 thin spears of asparagus on the cheese near the bottom of the prosciutto slice
7. roll up the asparagus in the prosciutto
8. drizzle the rolls with the vinaigrette, garnish with chives, and serve immediately
asparagus-prosciutto rolls
6 stalks thick asparagus or 12 stalks thin, trimmed
1 tbsp white wine vinegar
1 tbsp dijon mustard
1/2 tsp honey
1 clove of garlic, thinly sliced
1 small shallot, minced
salt and freshly ground black pepper to taste
3 tbsp extra-virgin olive oil
3 thin slices prosciutto, cut in half crosswise (i didn't cut mine)
3 tbsp goat cheese or cream cheese, divided (i used goat)
1 tbsp minced fresh chives for garnish
1. boil a pot of salted water to a boil over high heat & prepare a large bowl of ice water
2. add the asparagus to boiling water and cook for until bright green and just tender
4. mix vinegar, mustard, honey, garlic, shallot, salt and pepper; pour in olive oil and whisk until emulsified
5. set a slice of prosciutto on a clean surface and spread on 1/2 tablespoon of goat cheese
6. set 1 thick spear or 2 thin spears of asparagus on the cheese near the bottom of the prosciutto slice
7. roll up the asparagus in the prosciutto
8. drizzle the rolls with the vinaigrette, garnish with chives, and serve immediately
oh mah gah. these were good. the vinaigrette was so amazing i was eating it plain from the empty plate. we made a whole bunch of these and finished every last one. i forgot how good shallots are!
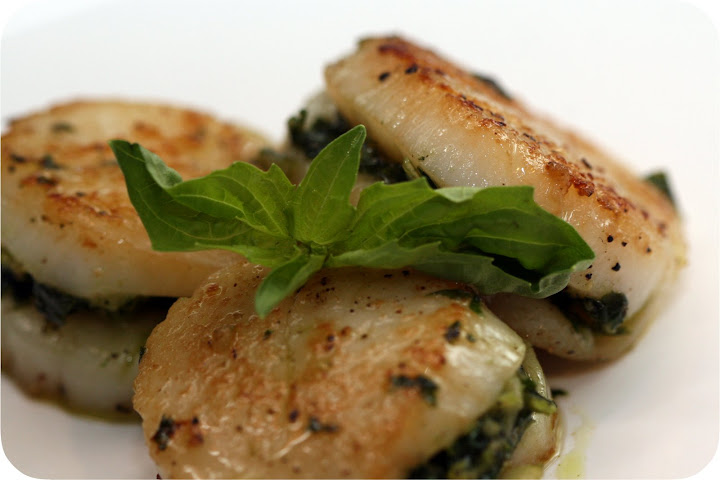
seared scallops
this next one made me a little nervous. husband loves scallops...i've never had any i've really even liked. but today was about trying new foods in new ways, so i took the plunge. and thanks to valentine's specials, a pound of these sea scallops was only $10! we ended up with two separate meals.
also, i have an aversion to flavors/scents found in soap used in foods. things like jasmine tea and rose ice cream make me was to scrape the residue off my tongue...i do not enjoy floral "essence" in my meals. i do enjoy herbs, so instead of using lavender oil, i put real lavender (from our plant) in some olive oil and heated it slightly...it was far less "soapy" than true lavender oil, but gave a hint of flavor. still, i'm sharing the original recipe in case you don't mind tasting soap.
also, i have an aversion to flavors/scents found in soap used in foods. things like jasmine tea and rose ice cream make me was to scrape the residue off my tongue...i do not enjoy floral "essence" in my meals. i do enjoy herbs, so instead of using lavender oil, i put real lavender (from our plant) in some olive oil and heated it slightly...it was far less "soapy" than true lavender oil, but gave a hint of flavor. still, i'm sharing the original recipe in case you don't mind tasting soap.

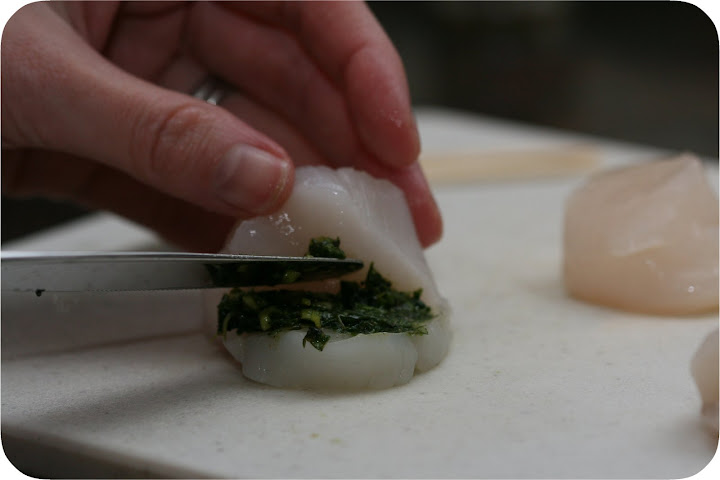

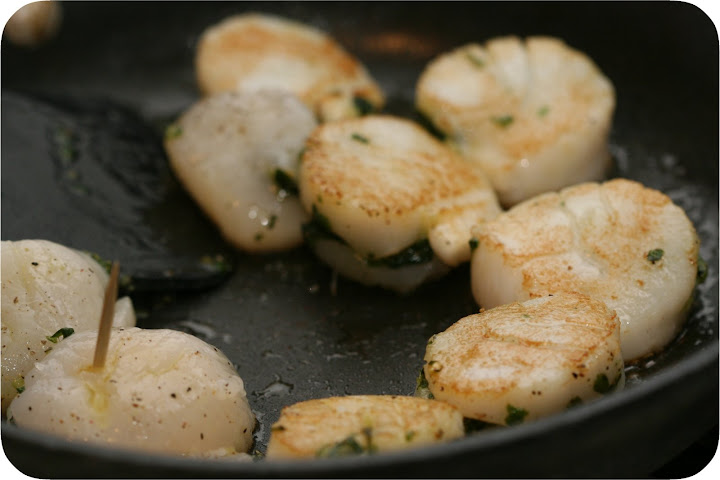
if you think you don't like scallops, try these
grilled scallops with basil and lavender essence
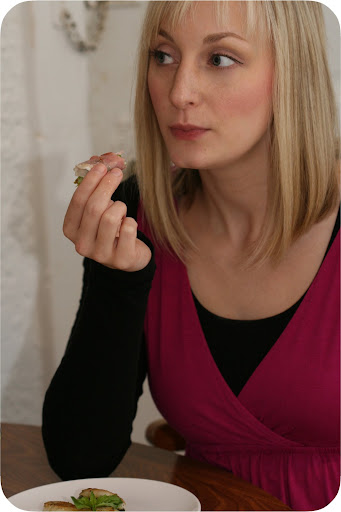
stay tuned for the rest!
15-20 basil leaves
1 clove garlic
1 clove garlic
1 tsp salt
1/4 tsp fresh ground pepper
2 drops essential lavender oil
2 tbsp olive oil
3/4 lb sea scallops
1. combine basil, garlic, salt, and pepper in a food processor or blender; process until smooth
2. add 2 drops of lavender essential oil to 1 tbsp of olive oil, then add to the processed mixture
3. cover and chill for 30 minutes for the flavors to meld
4. prepare hot grill or preheat broiler (i used a hot saute pan)
2. add 2 drops of lavender essential oil to 1 tbsp of olive oil, then add to the processed mixture
3. cover and chill for 30 minutes for the flavors to meld
4. prepare hot grill or preheat broiler (i used a hot saute pan)
5. hold the scallop flat against a cutting board & cut a deep slit into the edge; be careful not to cut fully in half
6. gently pack a bit of the basil puree into the scallop using your finger or a small spoon
7. secure the scallop closed with a toothpick if the puree is seeping out
8. drizzle scallops with the remaining tablespoon of olive oil and sprinkle salt and pepper to taste
9. grill scallops for 2-3 minutes on each side, or until golden brown outside and barely cooked in the center (alternatively, you can broil or saute scallops)
i was wrong about scallops. these were yummy! even better for iffy scallop eaters? dredge in flour (+ salt, pepper, and cayenne) , dip in an egg/milk mixture, and coat with panko. fry those over a tiny bit of olive oil. um, yes. i'm a scallop convert.
i was wrong about scallops. these were yummy! even better for iffy scallop eaters? dredge in flour (+ salt, pepper, and cayenne) , dip in an egg/milk mixture, and coat with panko. fry those over a tiny bit of olive oil. um, yes. i'm a scallop convert.

stay tuned for the rest!
Labels: real food
Sunday, February 15, 2009
champagne+blogging
cheers! it's been one year since i started blogging on alaunamakes. i'm proud i was able to stick with it and happy that i'm still enjoying it. here's to another year of trying new things, taking pictures, and sharing them with the interweb. thanks for reading!
Labels: life
Thursday, February 12, 2009

love sweet love
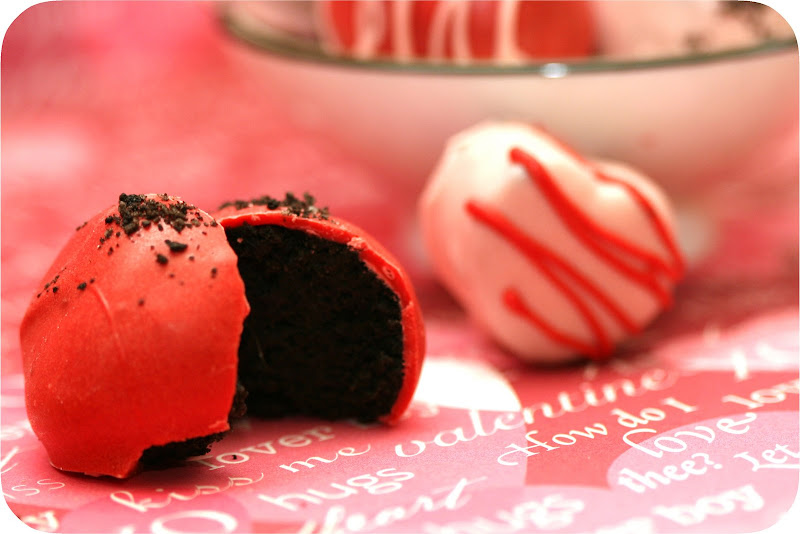
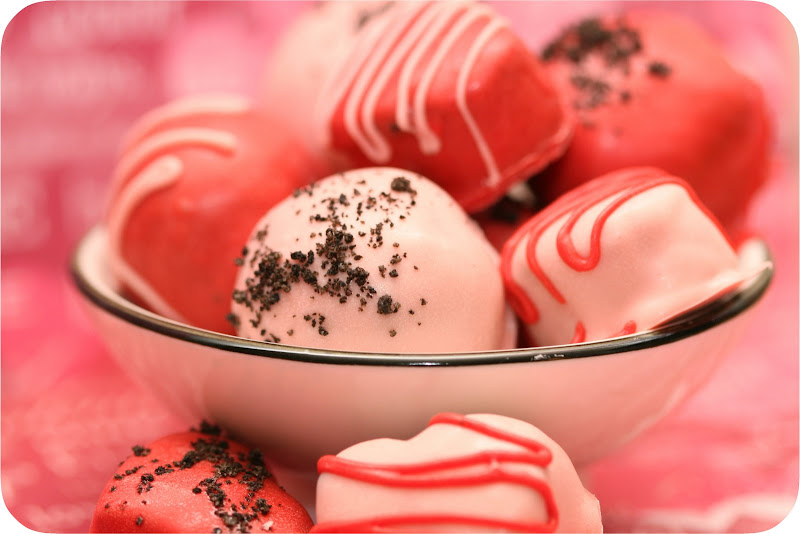
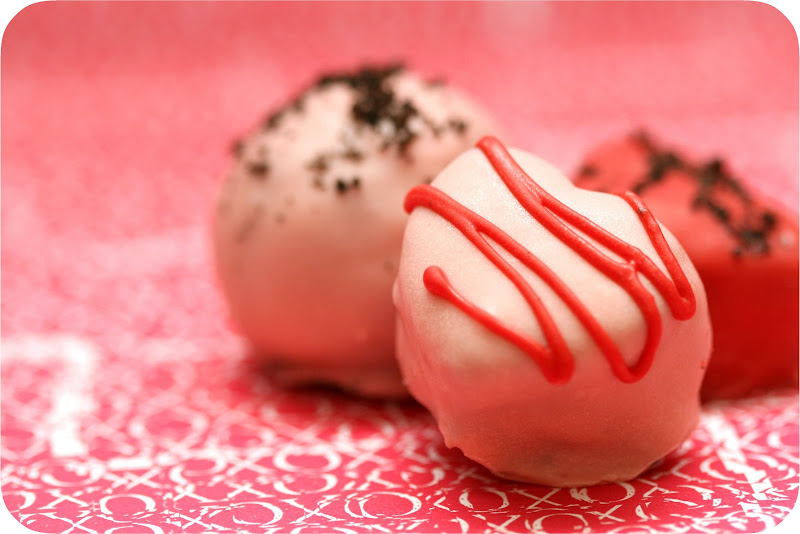
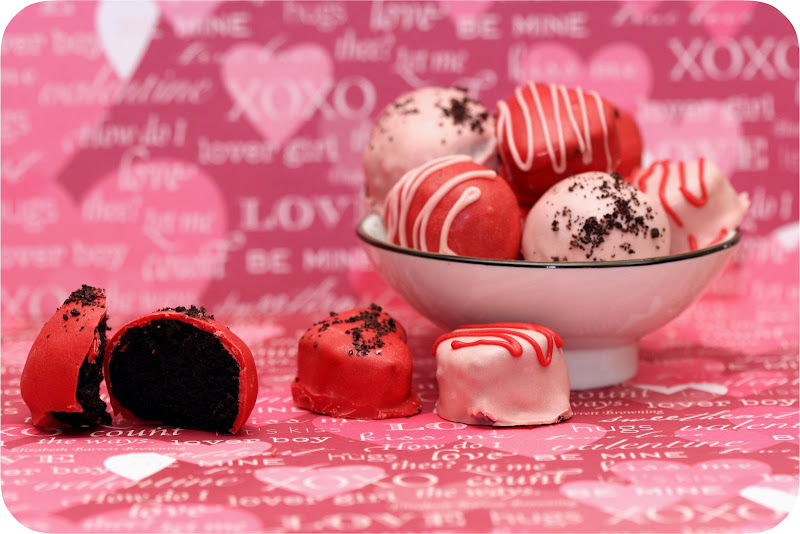
let's start this off by giving credit where credit is due. these oreo truffles are 100% inspired by bakerella - the heart cut outs, the instructions, everything. my coworker said she's had these before, years ago, so i'm sure they're not original...but i got them from bakerella (whose pictures and ideas are fabulous) and i am attributing them to her :)
i saw them a while ago when first coming across her site. you might remember that i made her cake balls/pops last spring/summer. i wouldn't call that first time a success, so i knew i'd try again. and what better time than to treat friends and coworkers to these truffles than just before valentine's day?
i saw them a while ago when first coming across her site. you might remember that i made her cake balls/pops last spring/summer. i wouldn't call that first time a success, so i knew i'd try again. and what better time than to treat friends and coworkers to these truffles than just before valentine's day?
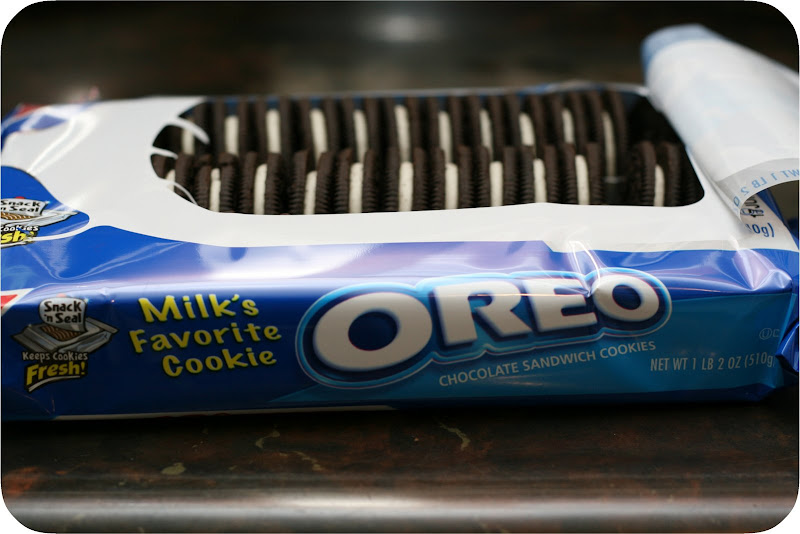
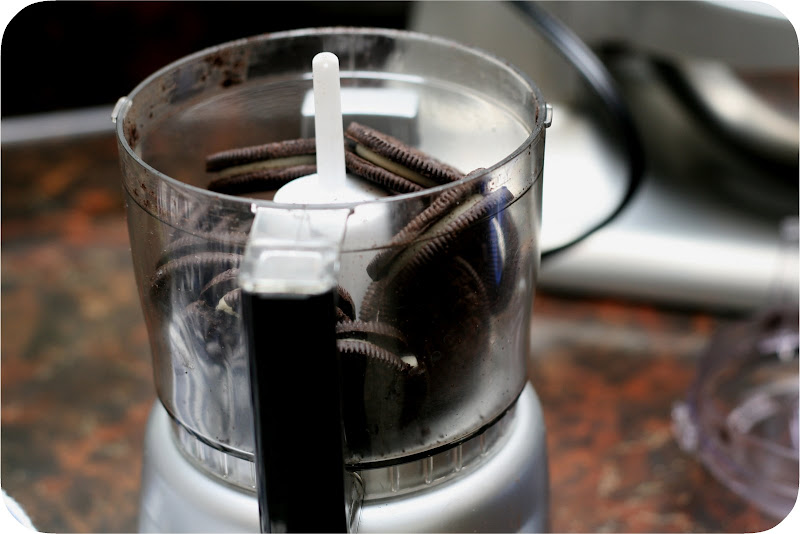

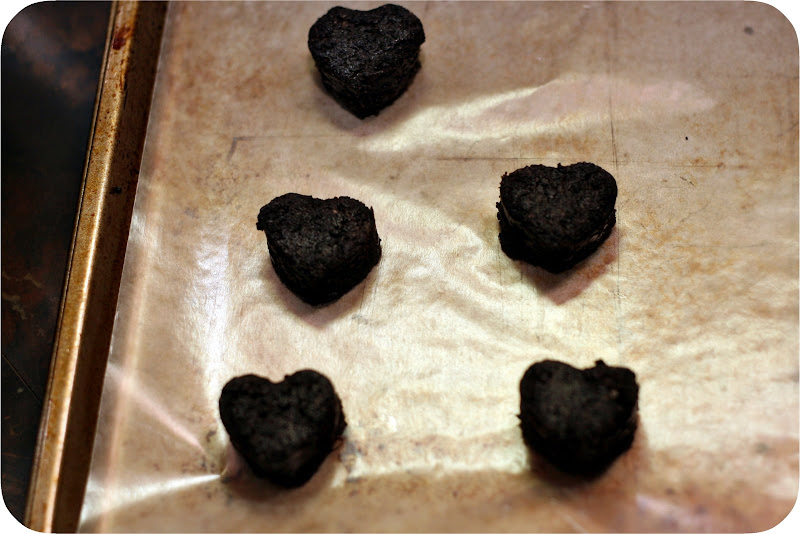
oreos and cream cheese

cute-laaaa
valentine truffles
oreo truffles
1 package oreos
1 80z package cream cheese
melting chocolate/bark/chips
1. in a food processor, grind 7 oreos (cream and all) to a fine crumb; reserve
2. grind the rest of the cookies
3. in a large bowl, mix cream cheese with oreo crumbs until well combined
4. roll out in 1" balls and place on wax paper lined cookie sheets (or press mix through mini cookie cutter shapes)
5. place in fridge or freezer to keep firm (i added this step because i'm not good at these yet, and this helps)
6. melt candy/bark/chocolate according to package instructions
7. roll in melted candy and place back on wax paper to set
8. top with reserved crumbled cookie or piped melted candy/chocolate


cute-laaaa
and hello?! these are adorable. i have room to go (both on the photography and the melted candy technique) but they are so much better than the first time around. i know it's because the oreo mix was much firm and finer than the cake mix, so it stayed together much better in the warm candy.
you know what else? they are good. rich and straight up oreo flavor, so you can't eat too many...even husband thought so. and um, if you've looked at the ingredient list, that's probably a good thing. i'll do you a favor and keep you in the dark. i made the mistake of looking at the calories in the 2 bags of candy melts and after i picked my jaw up off the floor, i made the decision not to revisit the calorie information on the oreo or cream cheese packages.
you know what else? they are good. rich and straight up oreo flavor, so you can't eat too many...even husband thought so. and um, if you've looked at the ingredient list, that's probably a good thing. i'll do you a favor and keep you in the dark. i made the mistake of looking at the calories in the 2 bags of candy melts and after i picked my jaw up off the floor, i made the decision not to revisit the calorie information on the oreo or cream cheese packages.

valentine truffles
plus, these are easy. you still have time to do them before the big love fest day. i just finished them (in fact this is my first post with pictures and such from the very day i did the actual making) and can't wait to share them with my coworkers. yum - happy valentine's day!
Labels: dessert
Tuesday, February 10, 2009
pretty!
i was at a specialty store in december that carried a random assortment of adorable things. a ceramic mug shaped like a to go cup - with silicone lid! ice cube holders that make diamond and gemstone shaped ice. not everything was totally unique, but it was such a cute little shop and it was there that i found some glass topped magnets with little pictures magnified in them. i've seen them before, but these ones had adorable little pictures of scooters (like a vespa, but not) and i knew the perfect person that would have loved them. he had recently done something very nice for me and even though we often do things for each other (so often that he had asked to stop the back and forth thank yous that go along with these favors), it was above and beyond and i figured this was just a small little token of gratitude. but then i saw that for four tiny magnets, it would be $14. now this friend means a lot to me...but if i was going to break the rules and get a gift, it would have to be for more than 4 magnets at $3.50 each (um, i totally used a calculator to figure that out).
days later i was still thinking about these cute little magnets. there weren't just scooters. there were pictures of flowers and patterns and animals and they came in different sizes and...and who ever thought magnets could get a person this excited?
so i did what anyone obsessed with the internet would do and searched for a tutorial or some project similar to make my own. well, i found all sorts of information! feel free to google marble magnets - you'll see that there are a lot of people making these little guys. i'm not taking credit for coming up with the idea or how to do them...but i also don't know who exactly to give credit to. so i'll give a run down here on how to make them and you can go in search of detailed tutorials with pictures and other suggestions if you so desire :)
this is my technique. you might find a way to do it better, but this does the trick for me.
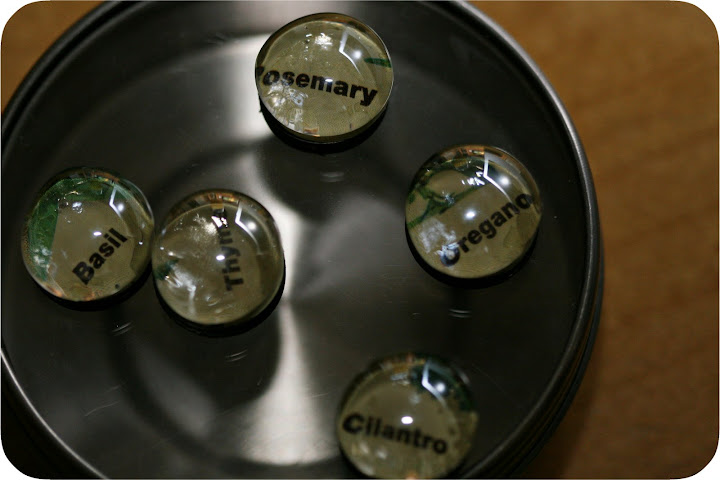
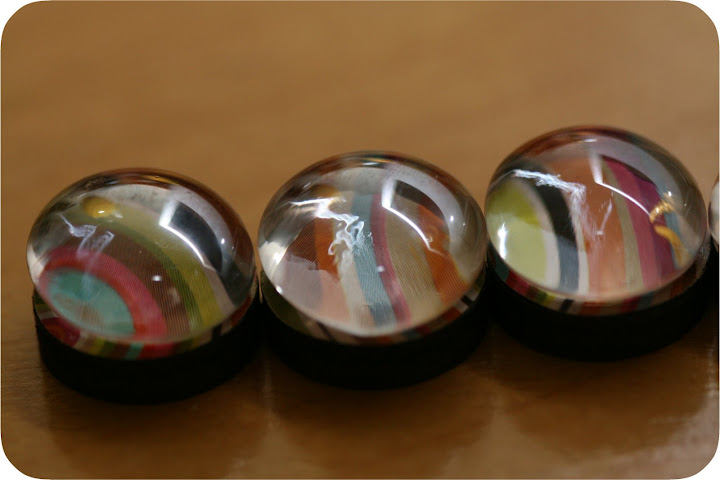
marble magnets
3/4" craft magnets
clear glass flat back marbles
magazines (shiny paper worked best for me)
E6000 glue
3/4" hole punch and/or scissors
1. using hole punch or scissors, cut out small picture circles from magazines
(to see what works, use a marble to see how magnified something will be - you'd be surprised)
2. place a dot or so of glue on a magnet and sandwich the glued side between another magnet
3. twist to coat both, then pull apart (this squish, twist, and pull apart should take 5 seconds or so)
4. cover and center the glued side of the magnets with your chosen picture circles
5. allow to dry for a minute or so, just to set
6. repeat the squish, twist, and pull routine with two glass marbles
7. pressing firmly, attach and center the glue backed marbles to the picture/magnets
8. allow to dry fully before hanging on a magnetic surface
tips:
*the hole punch might be pricey (about $7), but it is much easier and neater than cutting circles with scissors
*flip the hole punch upside down so you can see what you're cutting out
*check the back of the marbles - the ones with "veins" don't look as nice as the smoother ones
*i used marbles that are mostly round (or, you can find plastic ones online that are perfect circles)
*use magazines! in trying to do this as a replacement for the marbles in the store, i found great pictures of scooters and printed them. inkjet on regular paper, laser on cover stock, photo printer and glossy paper...nothing worked! the E6000 is strong stuff and bled through everything but the shiny magazine paper.
i loved this project so much that i couldn't wait to start. in fact, husband and i got snowed out while driving near chicago and had to stay in a hotel over night. there was a walmarts across that there street and i went and bought all of the supplies. that night i made my first four magnets in a tiny hotel room. hello glue fumes, welcome to my lungs!


pouches to hold the magnet sets
after making those four, i knew i wanted to make more for my friends and family. i spent lots of time customizing these with printed pictures meant for each of the intended recipients. then i found that the prints didn't work so i just started punching patterns from old magazines. ads worked really well and soon i had made about 70 magnets.
but how to package these magnets? in the store, the magnets came in a rectangular magnetic box. i didn't have any of those...but i was quickly inspired by a starbucks gift card i received. it came in this adorable knitted pouch-like envelope complete with a button! i bought glittery felt, fancy buttons and metallic red embroidery thread and made little pouches for all of my magnte sets.
i'm sure based on the picture you can figure it out, but let me know if you'd like a tutorial :)


sister and mom sewing pouches
no i did not make workers out of my family (i have done this in the past). after giving them their magnets, they couldn't wait to make their own so i taught sister and mom how to make both projects. we used one of mom's hospital uniform catalogs and found some great patterns. it is so funny where some of the pictures came from. bedding catalogs, old calendars, fashion magazines and even food ones!

did you know that this particular pattern came from a KY ad?
i also taught this craft at my soap making class. while the soaps were freezing i laid out piles of magazines and let my class have at them. when i mentioned i had read that pennies are the perfect size for the magnet, they couldn't resist. and it's true! in no time there was a beautiful set of 4 shiny penny magnets.
in total, i made about 125 magnets over december and january. its now one of my most favorite projects. husband liked them too. when i first made all those magnets i put them on our fridge. as i gave them, set by set, away as gifts, husband noted that i needed to make more to fill the void...he did not offer to make his own.
(as a final note, friend, if you read this...which he might...know that i am sorry that you didn't get scooter magnets)
Labels: crafts
Subscribe to:
Comments (Atom)
